Sweater Surgery
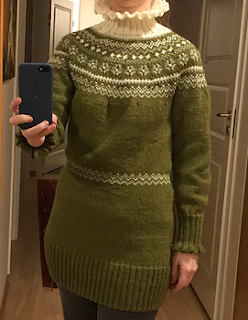
Inspired by my friend Ellen, I decided to try my hands on some fair isle knitting in the beginning of this year. I did a slightly modified version of Drops Garnstudio's Merry Cassandra in Drops Lima yarn with the colour work done in Drops Merino Extra Fine. For more details, please check out my project in Ravelry.
One of the modifications I did was to move the band of colour work from the hip to the upper waist. Or so I thought. But knitting bottom-up can sometimes result in surprising results, and the beautiful waist band ended up across my stomach with not very flattering results.
I also didn't like the flared neck. That was easy enough to change, so I did. But the waist band was there to stay, or so I thought. Until I watched Episode 33 of Fruity Knitting, where Andrea cuts and grafts her daughter's sweater to correct a mistake (starting around 11:00 in the video). She goes through the process step by step in a very clear way, and manages to make it seem less scary. So I decided to give it a go.
My sweater was knitted in the round, so my process was a little bit different from Andrea's, but not much. Here's how I did it.
First, I picked up all the stitches above the band. I used my 100 cm 2.0 mm KnitPro circular needles and started where the jog in the pattern is. This was probably not necessary, but I found it easier to use the pattern as a guide to make sure I stayed in the same row. I decided to pick up the second row above the pattern in order to only have to worry about one colour when unravelling.


Then I picked up the stitches below the pattern. I realized I had to pick up the row immediately below the pattern, since the row before that was a decrease row. I wanted the same number of stitches on both needles for the grafting. I connected a 60 cm and an 80 cm cable from my Drops Romance set, and I used a 3.0 mm needle to pick up the stitches.


Then came the scary part: cutting the yarn. I picked up a stitch below the top row and a bit to the right of the jog, in order to leave an end to weave in later. The picture below shows the stitch on one of my new Prym Ergonomic sock needles.

I started by unravelling back to the needles, and noticed that I had missed a stitch, which was easy enough to pick up.

Then I unravelled the first row, which was a bit tedious. Every stitch has to be pulled out individually. My new Prims were really good for this. Their rounded tips didn't split the stitches.


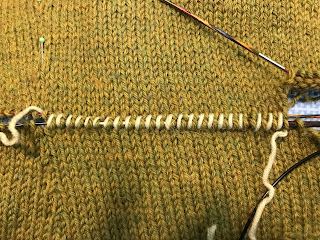
After that first row, the unravelling was quite easy. But I did use the scissors for some of the contrast colour yarn, since some of the ends had been woven in a bit too well (see picture below). I didn't cut the main colour yarn, though, since I didn't have a lot of it left over, and I was still considering knitting some of the unravelled section back up. So I thought I might need to save as much of it intact as possible.

Finally, I was left with a patient with a clean cut and all the excess fair isle work removed.

Next, I spent (or rather wasted, as it turned out) some time trying to figure out how to start the grafting in order to align the increase column above the cut with the decrease column below the cut. I tried securing the work with needles and counting backwards, but I kept losing count.

I tried using some of the scrap yarn to baste the two halves together. I really thought I had it then. But when I look at the final result, the columns are one off. Now when I look at the picture I took, I see where I went wrong. Oh well. (Nobody will ever notice, Jeanette. Let it go...)
I hadn't used the kitchener stitch before. I have seen it done, but I haven't had reason to ever use it myself. It seemed a bit complicated, but Andreas way of explaining it really made it easy. The only challenge was getting started, since I was working in the round. I had a few false starts, before I figured out that I needed to thread through the top stitch from the back first. Once I got going the process was very satisfying. At first I adjusted the stitches every 5-10 stitches or so, but after a while my hand found the right tension and I didn't need to make as many adjustments.

Then I got a bit blasé and thought I would be able to watch an old episode of Fruity Knitting while I was sewing. Then this happened. Somehow I managed to drop a stitch of the needle too early. So I had to go back and do it over. I still kept watching the episode, though, only with slightly more attention paid to my work.

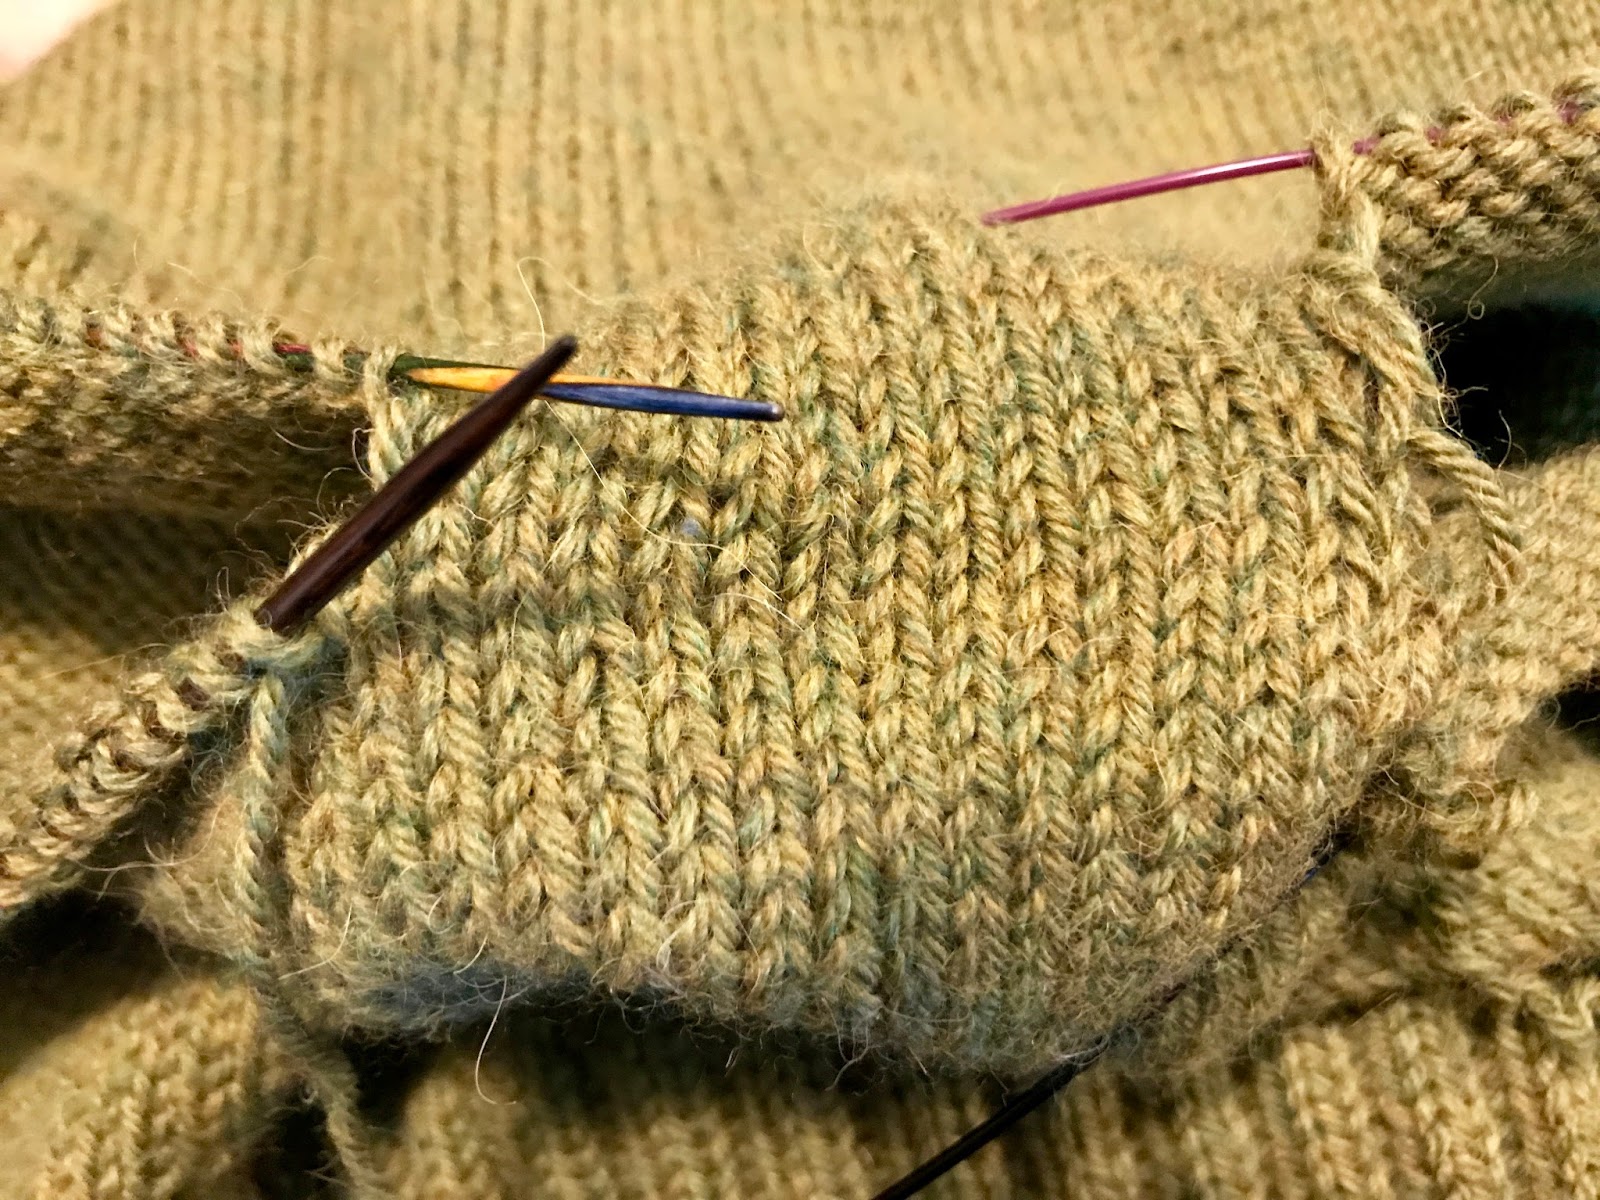
After I finished, I just had to weave in the ends and that was it! My failed sweater is rescued. Check in the picture below if you can see where the grafting happened. I have trouble finding it myself. I actually have to locate the last decrease row to know where it is.

In conclusion, here's a picture of me modelling the sweater in our back yard. Please notice the happy smile.

One of the modifications I did was to move the band of colour work from the hip to the upper waist. Or so I thought. But knitting bottom-up can sometimes result in surprising results, and the beautiful waist band ended up across my stomach with not very flattering results.

My sweater was knitted in the round, so my process was a little bit different from Andrea's, but not much. Here's how I did it.
First, I picked up all the stitches above the band. I used my 100 cm 2.0 mm KnitPro circular needles and started where the jog in the pattern is. This was probably not necessary, but I found it easier to use the pattern as a guide to make sure I stayed in the same row. I decided to pick up the second row above the pattern in order to only have to worry about one colour when unravelling.


Then I picked up the stitches below the pattern. I realized I had to pick up the row immediately below the pattern, since the row before that was a decrease row. I wanted the same number of stitches on both needles for the grafting. I connected a 60 cm and an 80 cm cable from my Drops Romance set, and I used a 3.0 mm needle to pick up the stitches.


Then came the scary part: cutting the yarn. I picked up a stitch below the top row and a bit to the right of the jog, in order to leave an end to weave in later. The picture below shows the stitch on one of my new Prym Ergonomic sock needles.

I started by unravelling back to the needles, and noticed that I had missed a stitch, which was easy enough to pick up.

Then I unravelled the first row, which was a bit tedious. Every stitch has to be pulled out individually. My new Prims were really good for this. Their rounded tips didn't split the stitches.


After that first row, the unravelling was quite easy. But I did use the scissors for some of the contrast colour yarn, since some of the ends had been woven in a bit too well (see picture below). I didn't cut the main colour yarn, though, since I didn't have a lot of it left over, and I was still considering knitting some of the unravelled section back up. So I thought I might need to save as much of it intact as possible.

Finally, I was left with a patient with a clean cut and all the excess fair isle work removed.

Next, I spent (or rather wasted, as it turned out) some time trying to figure out how to start the grafting in order to align the increase column above the cut with the decrease column below the cut. I tried securing the work with needles and counting backwards, but I kept losing count.

I tried using some of the scrap yarn to baste the two halves together. I really thought I had it then. But when I look at the final result, the columns are one off. Now when I look at the picture I took, I see where I went wrong. Oh well. (Nobody will ever notice, Jeanette. Let it go...)

I hadn't used the kitchener stitch before. I have seen it done, but I haven't had reason to ever use it myself. It seemed a bit complicated, but Andreas way of explaining it really made it easy. The only challenge was getting started, since I was working in the round. I had a few false starts, before I figured out that I needed to thread through the top stitch from the back first. Once I got going the process was very satisfying. At first I adjusted the stitches every 5-10 stitches or so, but after a while my hand found the right tension and I didn't need to make as many adjustments.
Then I got a bit blasé and thought I would be able to watch an old episode of Fruity Knitting while I was sewing. Then this happened. Somehow I managed to drop a stitch of the needle too early. So I had to go back and do it over. I still kept watching the episode, though, only with slightly more attention paid to my work.

After I finished, I just had to weave in the ends and that was it! My failed sweater is rescued. Check in the picture below if you can see where the grafting happened. I have trouble finding it myself. I actually have to locate the last decrease row to know where it is.

In conclusion, here's a picture of me modelling the sweater in our back yard. Please notice the happy smile.

Kommentarer
Skicka en kommentar